There are three ways to get a widget onto a layout. All start with + Add Source.
1. A web page (iframe)
Enter the URL of any widget (the same address you would give to an OBS Browser Source). If the site refuses to be embedded (alerts of some donation services), tick Load via server proxy: the app opens the page through itself and strips the headers that forbid embedding. HTTP, WebSocket and long-poll work through it.
2. A local HTML file
Add Source → HTML file: choose a .html file (CSS, JS and images next to it are picked up) or a whole folder. The app creates a plugin without permissions in plugins/local-<name>/ and puts it on the scene. Edits to those files are picked up when the widget page reloads. Up to 64 files and 6 MB; with several HTML files name the main one index.html.
3. Plugins
A plugin is a ready-made widget with settings and, if needed, access to Twitch chat, storage or a server part.
Add Source → Plugin store… lists plugin repositories. The default is compico/oc-plugins; you can add any repository as owner/repo, owner/repo@branch-or-tag or a github.com link. The catalog shows each plugin’s version, requested permissions and the commit it is built from, and installs, updates and removes plugins with a button.
An update is offered when the version in the repository is higher (or the files changed). New permissions are confirmed separately. To pin the code use a tag or a commit: owner/repo@v1.2.0. For private repositories add a fine-grained GitHub token (Contents: Read-only) in the store dialog; it is stored encrypted and sent only to api.github.com.
Installed widgets appear in Add Source → Widgets. After adding one, select its layer and edit its settings in the right panel (only the values you changed are saved; ↺ resets to the default).
Permissions
A widget asks for what it needs; the list is shown when you add it and can be changed in the layer properties. Without a permission the call is rejected.
| Permission | What it allows |
|---|---|
chat.read | read the chat of a Twitch channel |
chat.send | write to the chat as the bot or the streamer |
storage | keep JSON data of the plugin on this computer |
net.local | GET requests to programs on this computer (for example tosu) |
A widget is third-party code. It runs in a sandboxed iframe with no access to the app API, but everything you permit it does on your behalf: install plugins only from authors you trust.
Standalone plugins (WebAssembly)
Besides widgets there are standalone plugins: one .wasm file that runs inside the app, with no window of its own. It answers HTTP requests, receives events (for example a channel point reward), stores data, writes to the chat as the bot, publishes events to other programs, and can bring its own widgets and a settings page.
Install: download <id>.wasm from the plugin’s release (for compico/oc-plugins the tags are <id>-v<version>) and put it into the plugins folder, or install it from the store. Then open 🧩 Plugins in the header: Rescan picks up new files, and the plugin card lets you grant permissions, edit settings and restart it.
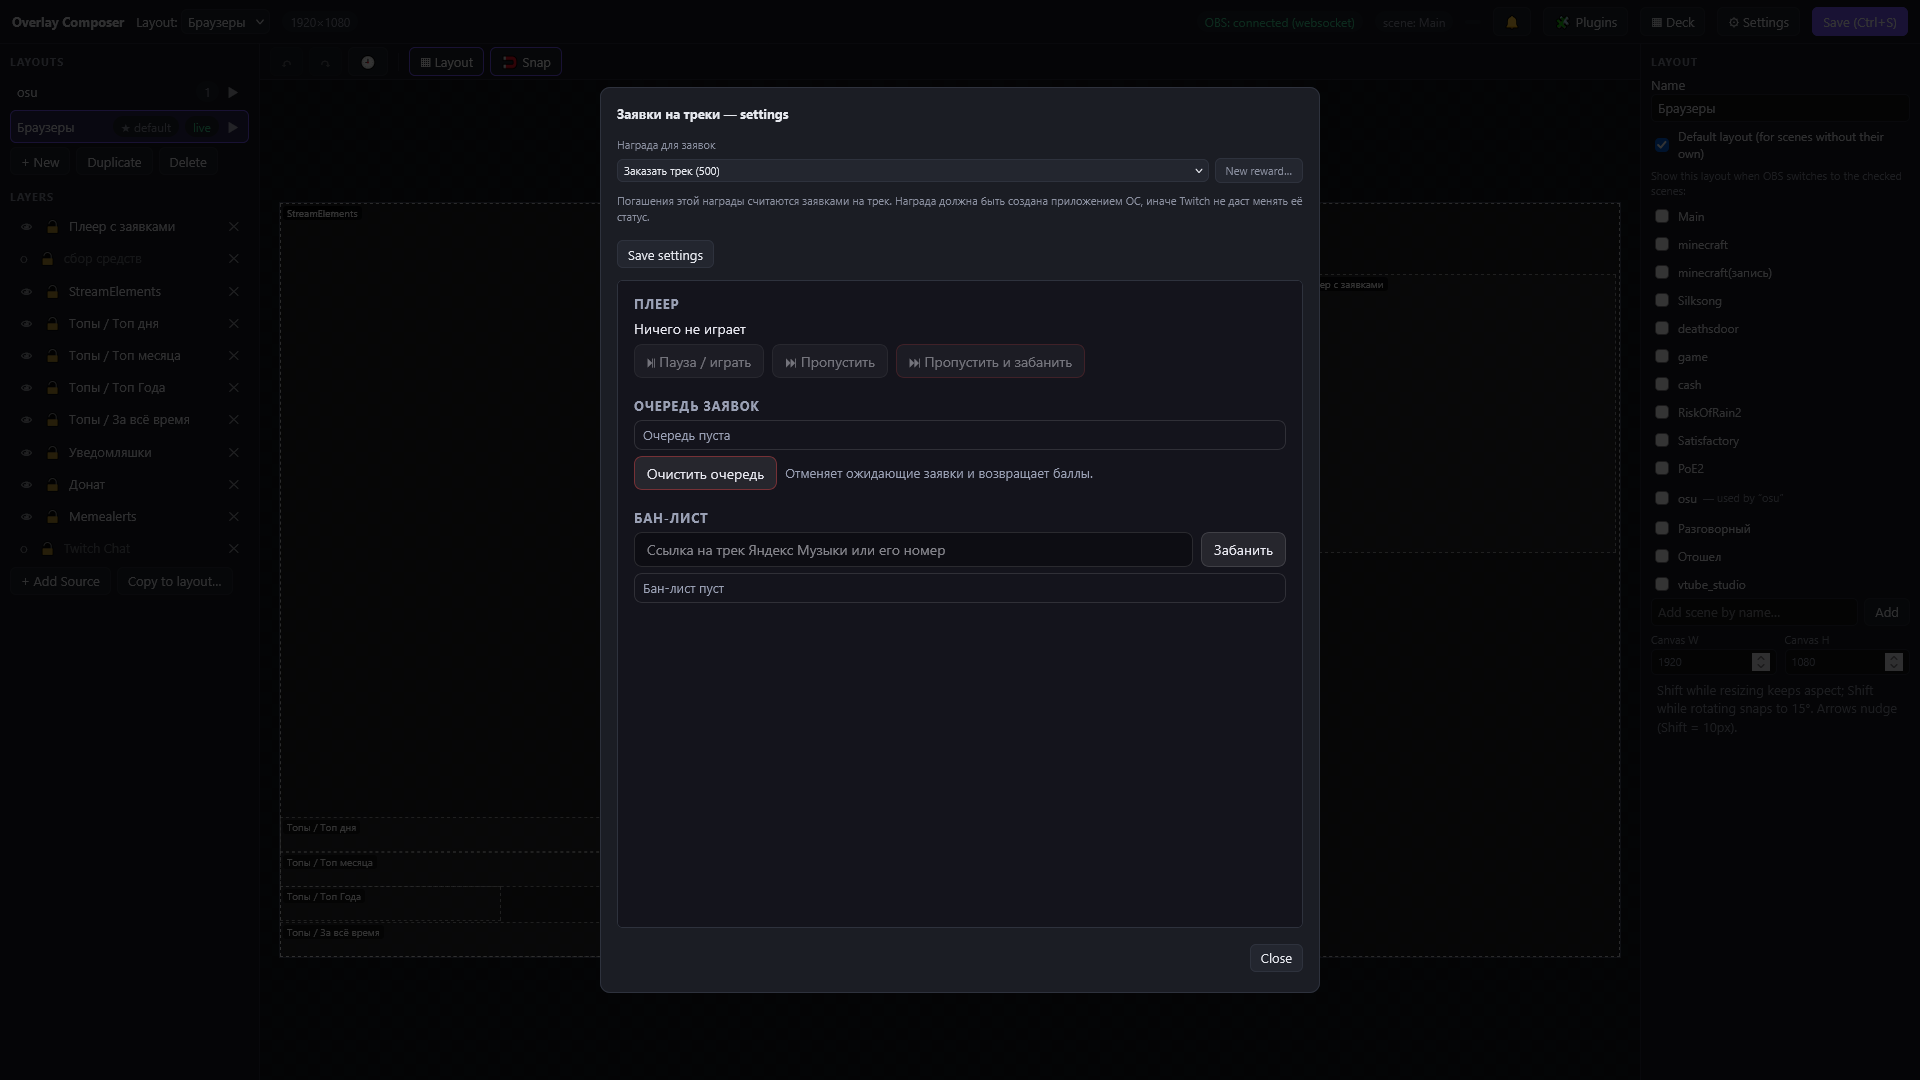 The settings page of the
music plugin (track requests for channel points): the reward, the player, the queue and the ban list.
| Permission | What it allows |
|---|---|
storage | keep data |
net.http | outgoing HTTP requests (never to loopback or private networks) |
twitch.redemption | receive reward redemptions and fulfil or cancel them |
timer | host timers |
events.publish | publish events to subscribers |
chat.send | write to the chat of the streamer’s channel as the bot |
Giving or changing permissions restarts the plugin. A plugin that crashes 5 times in a minute is stopped until you restart it. Everything the plugin logs goes to the app log tagged plugin=<id>.
Write your own
See Writing plugins: HTML widgets and standalone plugins in Go.